
We rebuild the room the water left behind.
Once the extraction and drying is done, we take it from there — new drywall, matched texture, paint, trim, flooring and cabinetry. One licensed construction company for the entire rebuild, anywhere in the Las Vegas Valley.
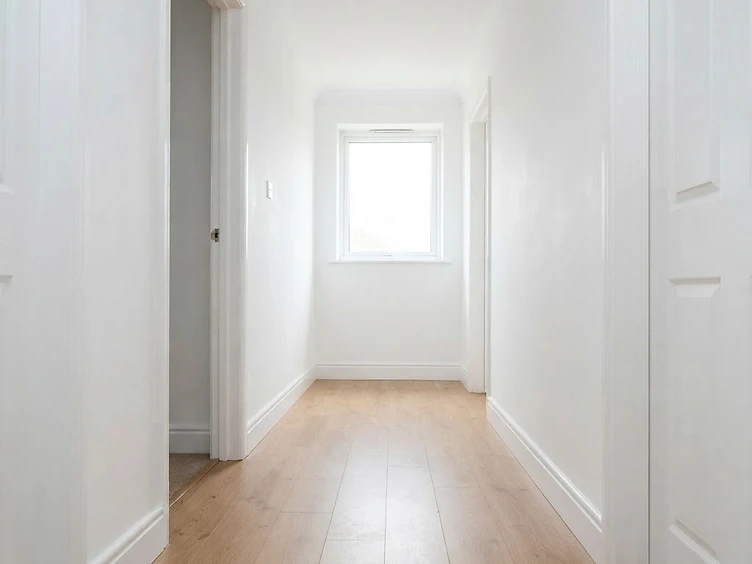
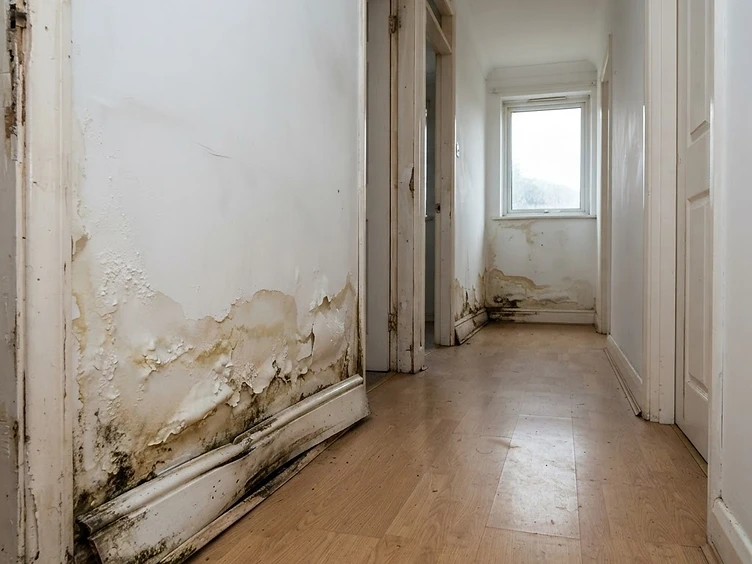
Water-Stained Drywall & Baseboard — Rebuild after dry-out
Drying the building isn't the same as fixing it.
Extraction and drying get the water out of the building — they don't give you a usable room back. That's our job. We start when the structure is dry and finish when the space looks like the water was never there.
To be clear about scope: we don't do water extraction, structural drying or demolition. That's the mitigation phase, handled by a restoration company with that equipment. We're the licensed construction company that rebuilds the property afterward.
Walls, texture & paint
New drywall hung, taped and finished, texture matched to the surrounding walls, then primer and paint blended to the existing color and sheen so the repair disappears.
Trim, doors & baseboards
Baseboards, casing, doors and hardware installed, caulked and painted — the details that make a rebuilt wall read as original instead of patched.
Flooring & cabinetry
New flooring laid over a prepared subfloor, plus cabinet, vanity and countertop rebuilds with fixtures and plumbing reinstalled.
What the rebuild actually looks like
Drag the handle on each photo to see the damage we were handed and the finished space we gave back.

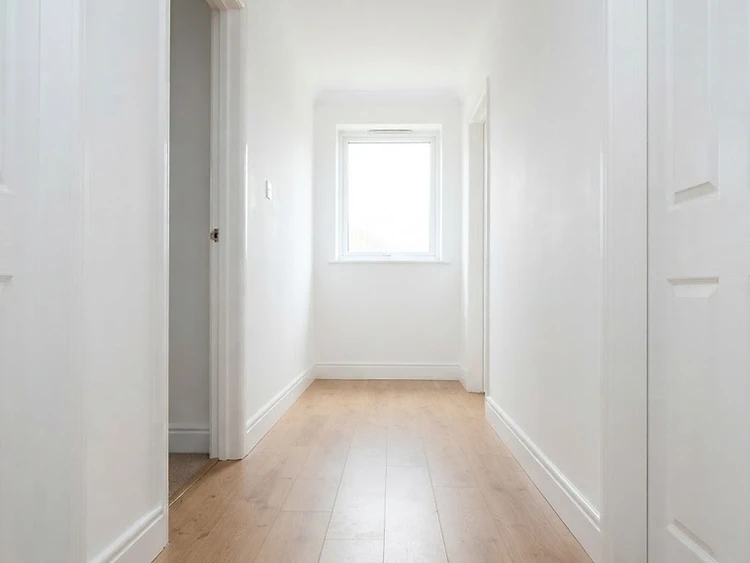

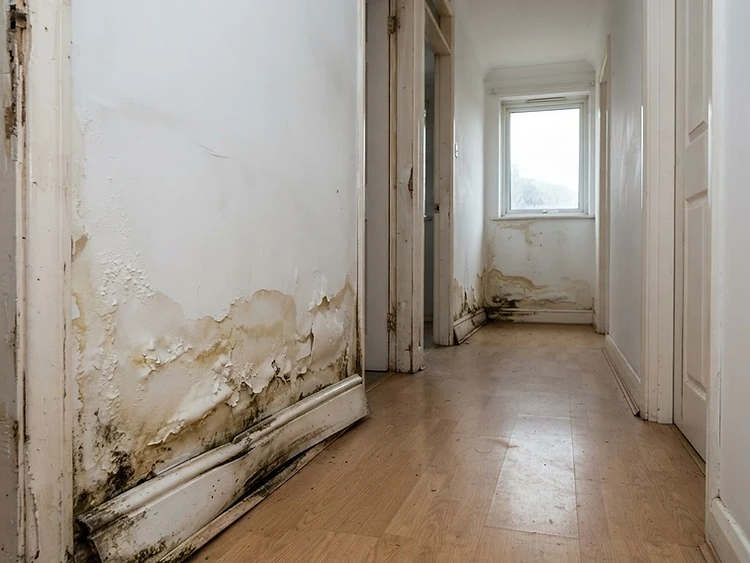
Water-Stained Drywall & Baseboard
Once the wall cavity read dry, the stained board and swollen baseboard were replaced with new drywall, matched texture, blended paint and new baseboards.

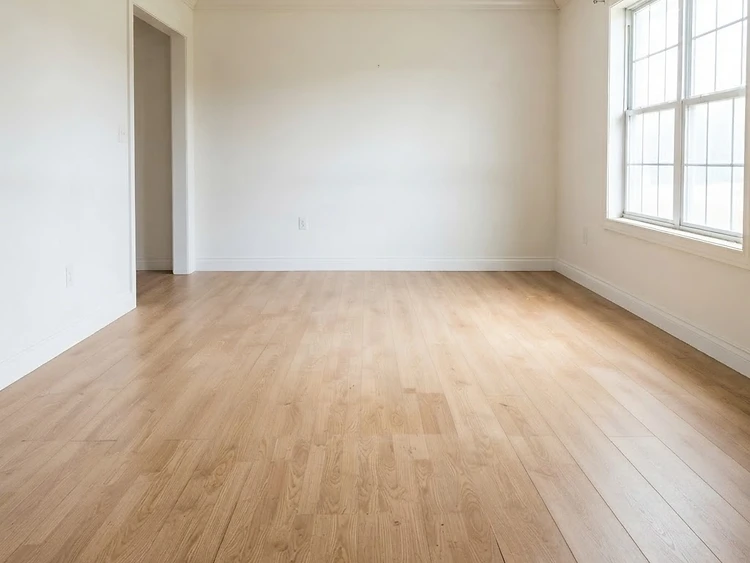

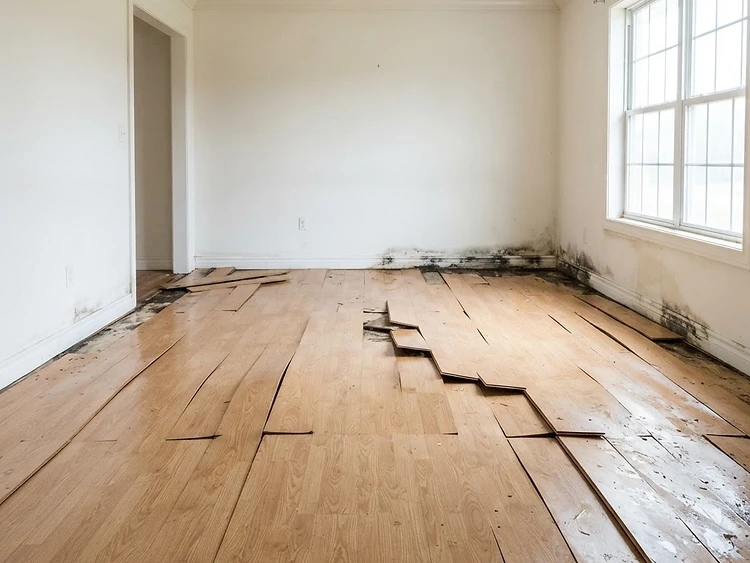
Cupped Flooring & Subfloor
New flooring laid over the prepared subfloor, with fresh baseboards reinstalled and painted to match the rest of the room.

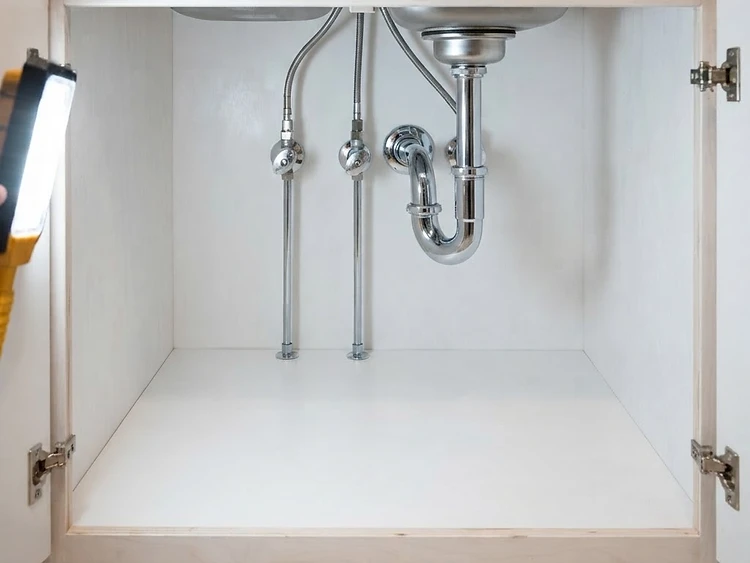

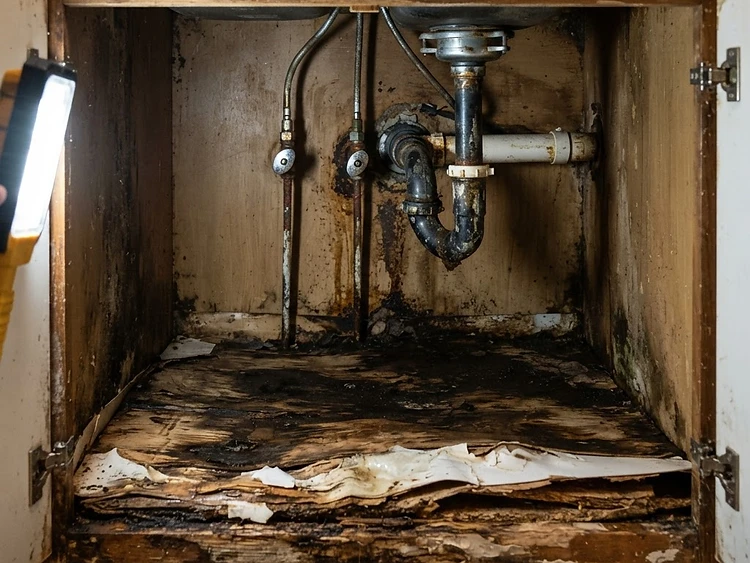
Swollen Sink Cabinet Base
The damaged cabinet floor and base were rebuilt with new material, sealed and finished, then the cabinet front and plumbing were reinstalled.
If it floods, do this — in this order
Written the way you'd want it explained at 11pm with water on the floor. Start at the top, work down, and skip nothing.
First, no matter how big it is
Shut the water off
The fixture valve first, the main shut-off if it won't stop there.
Kill power to wet rooms
Only if the panel is on dry ground you can reach safely.
Photograph everything
Wide shots and close-ups, before anything gets moved.
Get it extracted and dried
The mitigation phase. It has to happen first, and it isn't our part of the job.
The first three are yours. The fourth — extraction, drying and demolition — belongs to a mitigation company. We don't do that part; we do everything after it.
Then follow the one that matches your situation
Small spill or slow leak
A sink or appliance leak, a toilet overflow, or water you can soak up with towels. Usually one room, no standing water.
You have a day, not a week. Drywall wicks water sideways and upward.
- 1
Stop the water at the fixture
Turn the angle stop under the sink or behind the toilet clockwise until it stops. If that doesn't work, shut off the main.
- 2
Move everything off the wet floor
Furniture, rugs, boxes, pet bowls. Get electronics and paperwork onto a dry surface first.
- 3
Soak up what's standing
Towels, a mop or a wet/dry vac. The less water left on the surface, the less gets pulled into the floor and subfloor.
- 4
Check the wall, not just the floor
Press the baseboard and the drywall above it. If it's soft or the paint is bubbling, water is already inside the wall cavity.
- 5
Get air moving across the surface
Angle a fan across the wet area and run the AC or a dehumidifier. Air blowing straight down just pushes the water around.
- 6
Call a mitigation company if it's more than a spill
Soft drywall, a wet baseboard or a musty smell means the water went into the wall. Extraction and drying equipment is what pulls it out, and it has to happen before any rebuild starts.
Once it's dry and ready to rebuild, call us.
801-636-3010Burst pipe or major flood
Standing water, more than one room affected, a sagging ceiling, or water from the main line or the water heater.
This is an emergency. Get the water stopped and the drying started today.
- 1
Shut off the main water supply
Everyone in the building should know where it is. Turn it clockwise until it stops — that's the first thing that stops the damage growing.
- 2
Cut power to the wet rooms
Flip the breakers only if the panel is on dry ground and you can reach it without standing in water. If you can't, keep everyone clear until it's shut off safely.
- 3
Call a water restoration company
Extraction and drying is their equipment and their job, and it needs to start today. Call your carrier too, and tell them what you're seeing.
- 4
Photograph and video the whole area
Wide shots of each room, close-ups of damaged items, and anything that shows how high the water got.
- 5
Get valuables out, leave the rest
Move what matters to a dry room. Don't drag furniture across wet carpet — it tears it and spreads the water further.
- 6
Stay out of rooms with sagging ceilings
A ceiling holding water can come down without warning. Keep everyone, including pets, clear of it.
- 7
Don't run a shop vac near outlets
Standing water and electricity don't mix. Leave the water handling to the restoration crew.
- 8
Leave the water off until the line is repaired
Turning it back on before the break is fixed starts the whole thing over again.
Once the dry-out is finished, we rebuild it.
801-636-3010Once it's dry, that's where we start
New drywall, matched texture, paint, trim, flooring and cabinetry — the full rebuild that turns a dried-out room back into a room. One licensed construction company, one scope, one invoice.
From dried-out shell to finished room
Five rebuild steps, one licensed company, one point of accountability. You always know which step you're in and what happens next.
- Step 1
Rebuild Walkthrough & Written Scope
It starts the day the structure reads dry.
We walk the space, measure what has to be replaced, and give you a written scope with line-item pricing before any material is ordered. No guessing and no surprises.
- Step 2
Drywall, Texture & Paint
The wall goes back and blends into the one beside it.
New drywall hung, taped and finished, texture matched to the surrounding walls, then primer and paint blended to the existing color and sheen.
- Step 3
Trim, Doors & Baseboards
The details that make a rebuilt wall look original.
Baseboards, casing, doors and hardware installed, caulked and painted, with clean lines at every corner and opening.
- Step 4
Flooring & Cabinetry
The finish work that makes it a room again.
New flooring installed over a prepared subfloor, plus cabinet, vanity and countertop rebuilds, with fixtures and plumbing reinstalled.
- Step 5
Final Punch Walkthrough
We don't call it done until you walk it.
We go through the finished space with you, correct anything on the list, and hand back a room that matches the rest of the property.
Water Damage Rebuild — Common Questions
What property managers, Realtors and homeowners ask us most about the rebuild after a water loss.
More questions about certification, insurance or scheduling? Read the full FAQ.
Been dried out and left unfinished?
We'll put the property back together — new drywall, matched texture, paint, trim, flooring and cabinetry. Licensed, fully insured, and finished to the same standard as the rest of the building. Estimates are free.
Mon–Sat, 8am–6pm · NV State Licensed · Fully Insured